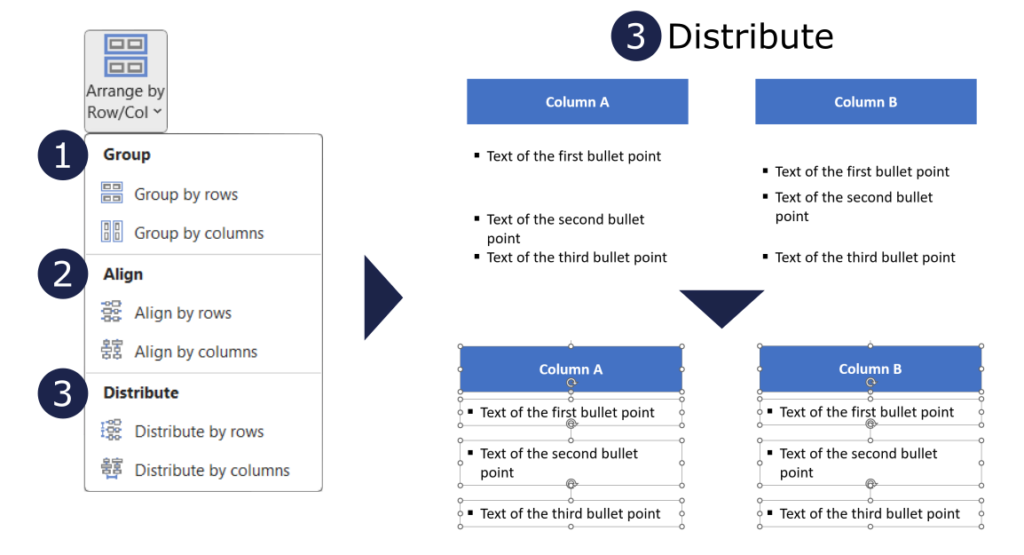
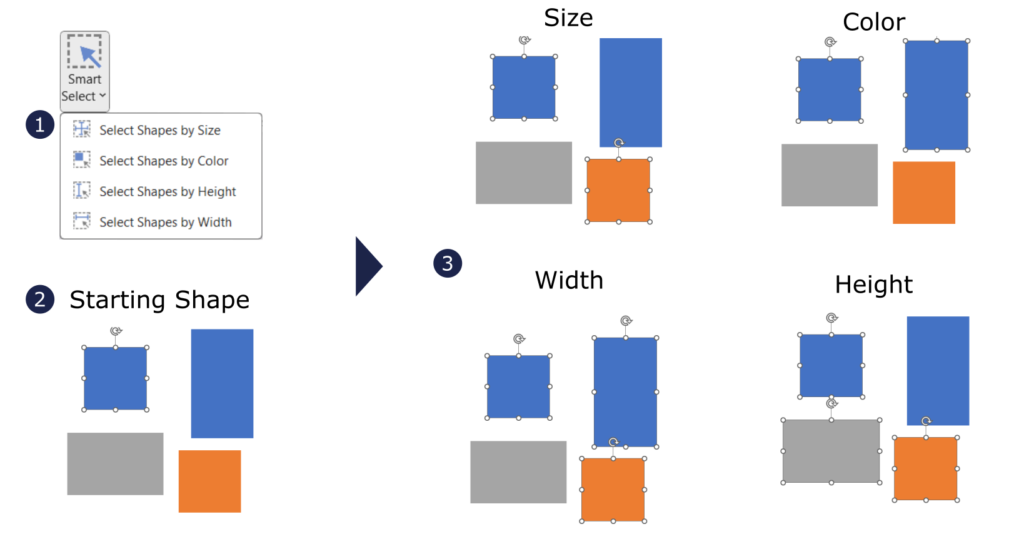
Key Functionalities:
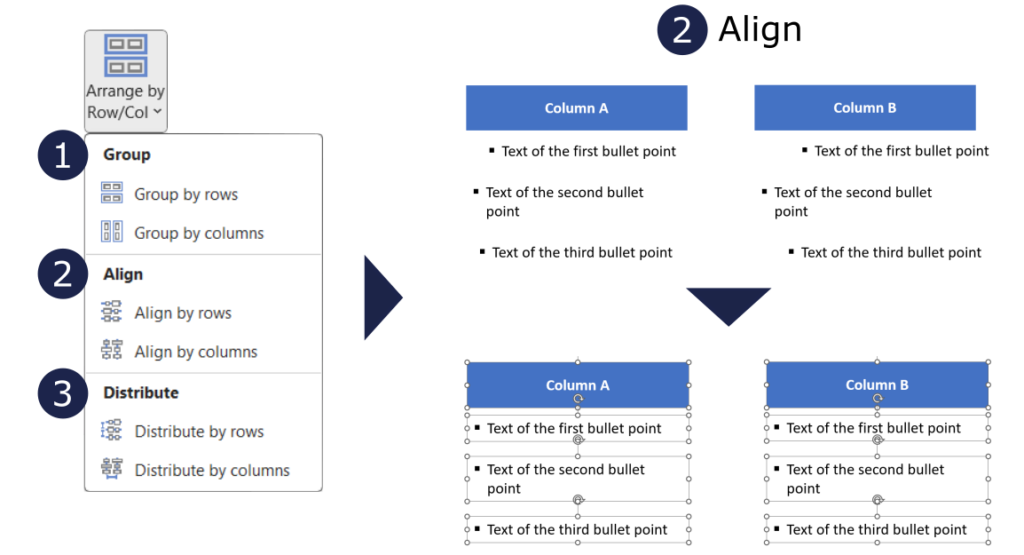
1. Alignment Options: choose from various alignment options, including vertical and horizontal alignment, to neatly arrange selected shapes.
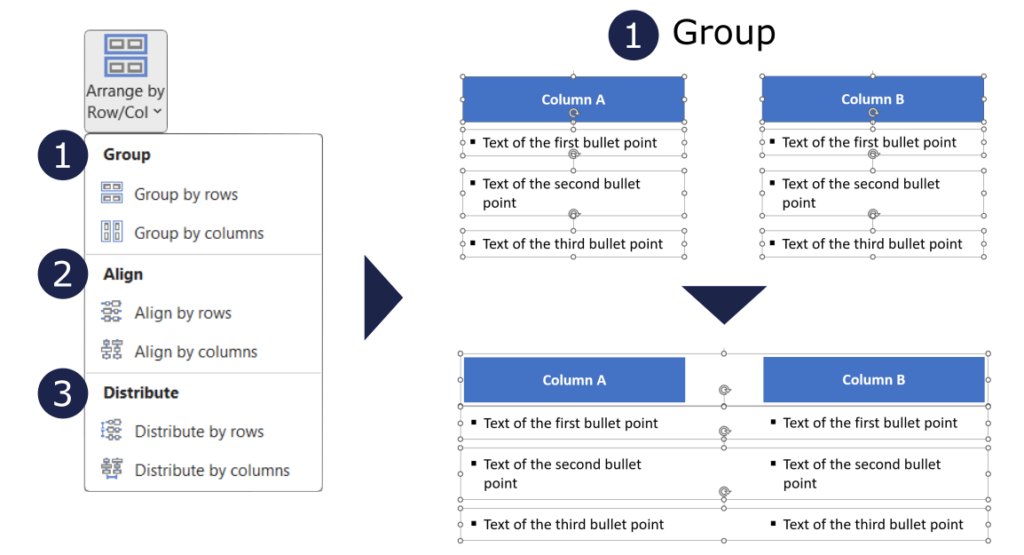
2. Grouping Capability: opt for grouping to unify selected shapes, facilitating streamlined movement and modification.
3. Distribution Controls: distribute selected shapes evenly either by rows or columns, achieving balanced and organized layouts.
How to use:
How to Use:
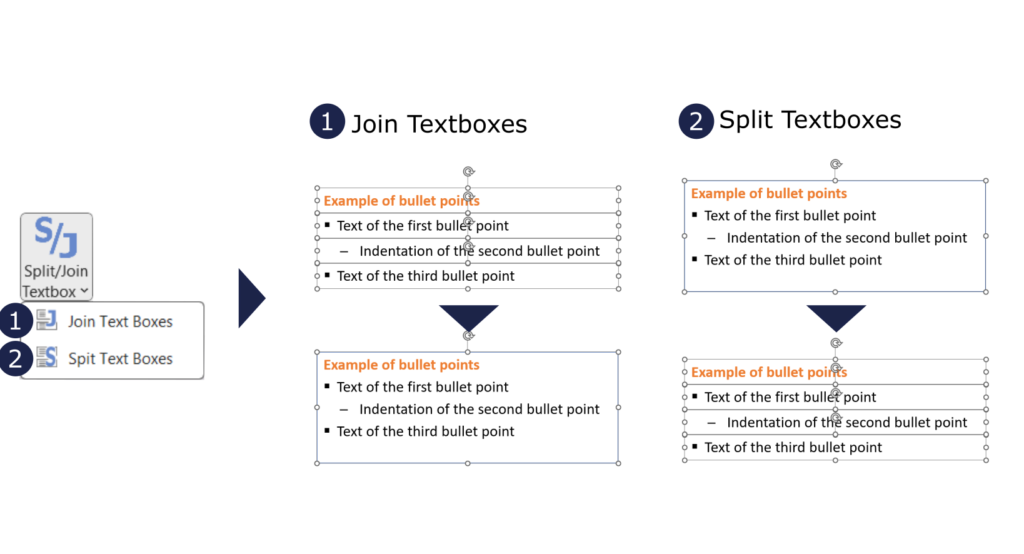
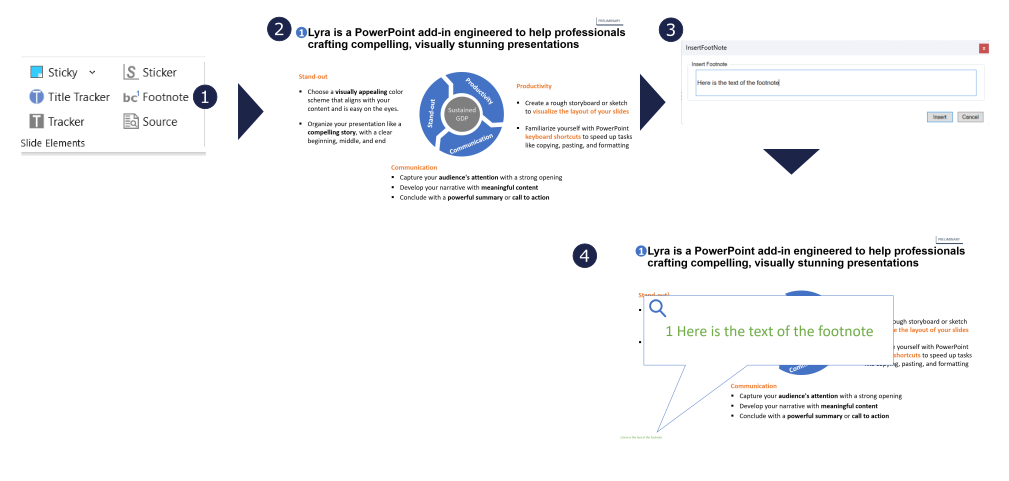
After splitting or merging, review the result and make any necessary adjustments to ensure the content maintains its intended structure.
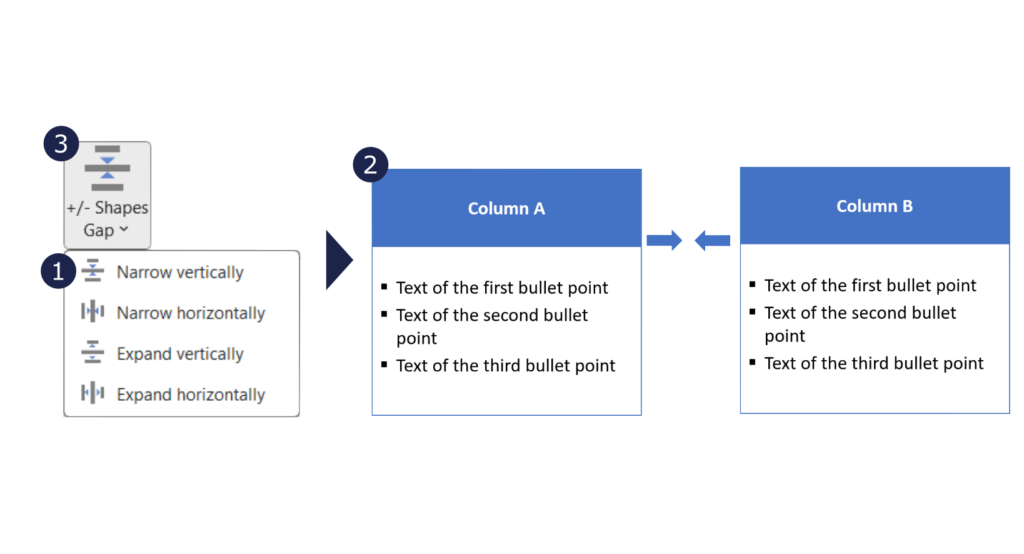
How to use:
How to use:
How to use:
How to use:
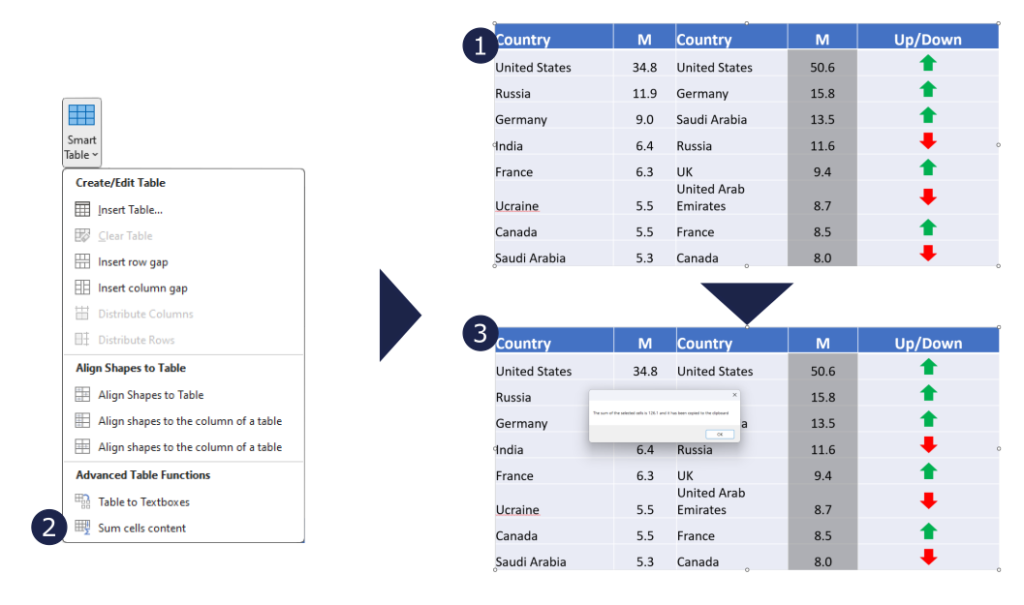
Key Functionalities:
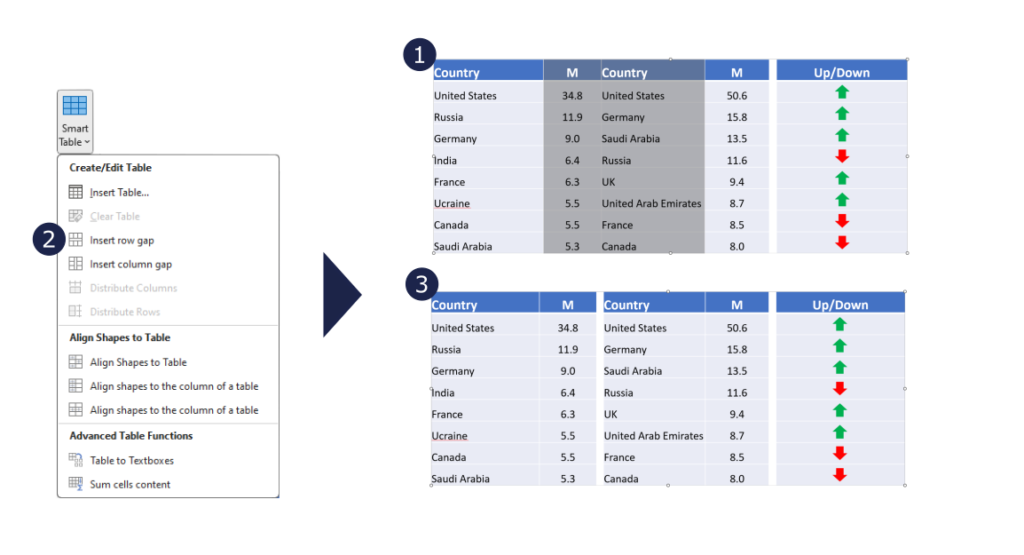
1. Add Gaps Between Rows and Columns: easily insert gaps between selected rows and columns.
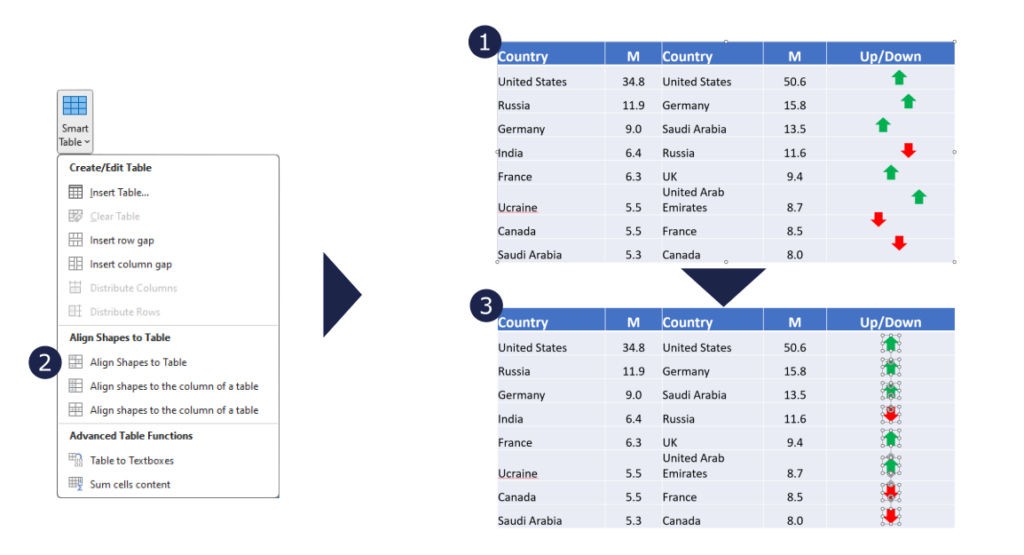
2. Streamline the alignment process by aligning shapes to the cells of a table. Select shapes and choose to align them to the cells beneath, with the option to align based on the leftmost shape in a row or the topmost shape in a column.
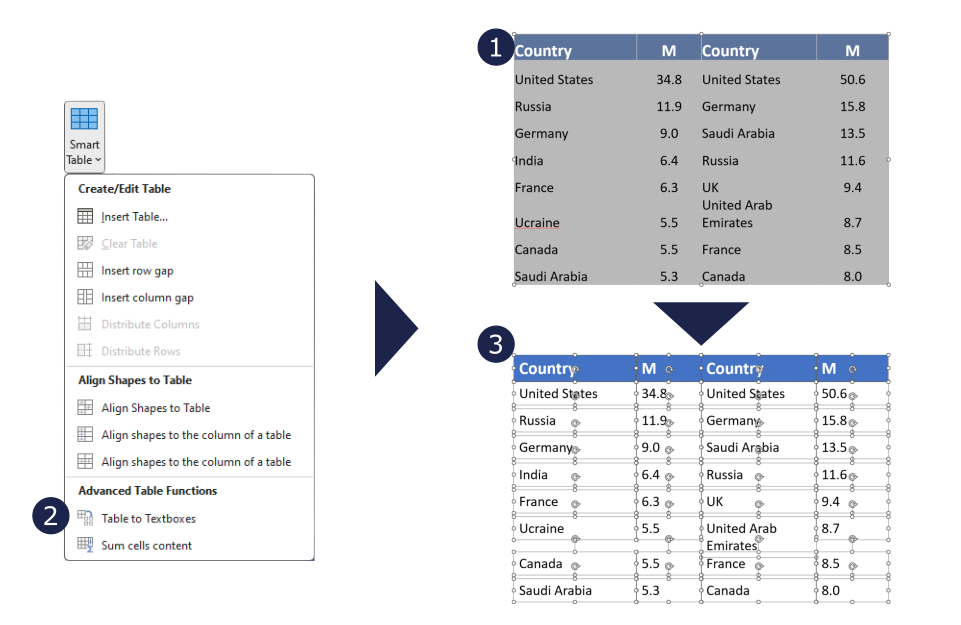
3. Effortlessly transform tables into textboxes with a single click. Enhance the flexibility of your document layout by converting tables into versatile text containers
4. Compute the sum of a selected column within the table. Click on the function, select the column to be summed, and watch as the tool calculates the sum, saves it to the clipboard, and displays the result in a convenient message box.
How to use:
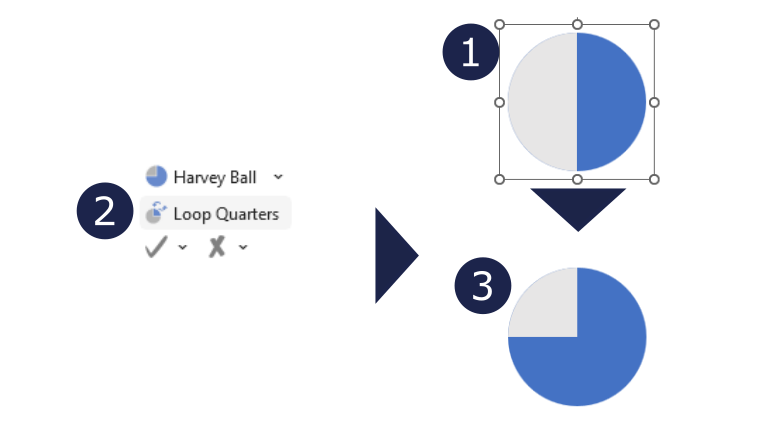
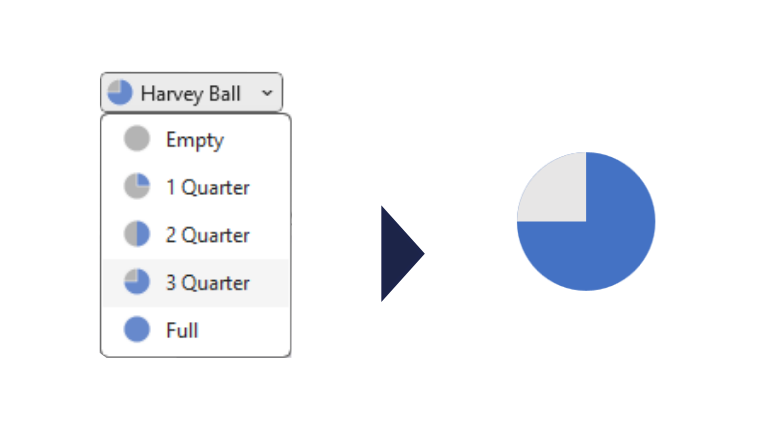
Key Features:
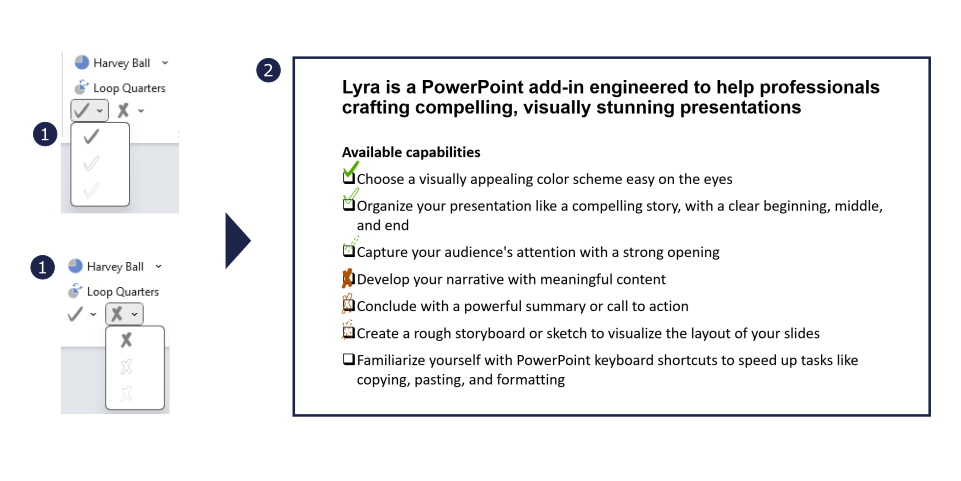
Key Features:
How to use:
Key features:

How to use:
How to use: